How to Install Wood Siding: A Step-by-Step Guide for Homeowners

The Short Answer: Installing wood siding starts with prepping clean sheathing, adding house wrap for moisture protection, and working upward from a level starter strip. Natural wood siding brings genuine grain, character, and warmth to any exterior wall, and the right installation process keeps it looking sharp for decades.

Your home's exterior takes a beating from weather, sun, and seasonal shifts. Quality wood siding protects the structure and shapes the look of the entire house. A solid wood siding installation takes the right tools, careful prep work, and a clear step-by-step approach for a clean, lasting result. The general installation process is consistent across most wood products, though regional differences in climate and humidity can affect timing and prep.

Planning Before the First Nail

Before opening a box of siding, planning saves hours of headaches later. Rushing past this stage leads to wasted material, crooked rows, and callbacks.

Infographic: Pre-Install Siding Checklist

Check Local Building Codes

Every municipality has rules about siding installation, and many require permits for full replacements. Check your local building codes or call your city's building department for detailed information on setbacks, fire ratings, and moisture barrier requirements. Skipping this step can mean tearing off finished work.

Measure and Order Materials

Measure each exterior wall in square feet, add the totals, and include 10 to 15 percent extra for cuts and waste. Order trim, corner posts, and fasteners at the same time so your project isn't delayed waiting on a single part. If you're replacing existing siding around a new window or old window, order extra trim to match.

Choose Your Wood Siding Type

Wood siding comes in a few common profiles and styles, each with its own look and install pattern:

  • Lap siding: Horizontal boards that overlap each other, the most traditional exterior siding profile.

  • Shiplap: Boards with a notched edge that lock together for a clean, flat surface.

  • Tongue and groove: Tight-fitting boards that work for both horizontal siding and vertical siding applications.

  • Board and batten: Wide vertical boards with narrow battens covering the seams for a rustic, dimensional look.

Running boards horizontally or vertically is the most common siding orientation. Material can also be installed in a diagonal or chevron pattern for a more custom look, though this typically requires additional time, labor, and underlayment prep. Reclaimed wood adds another layer to the decision: pre-weathered boards arrive with authentic patina, dimensional stability, and texture that newly milled wood can't replicate. For more on how reclaimed wood compares to other siding options, check out our blog on exploring different types of siding for a home.

Tools, Materials, and Wall Prep

A clean, dry wall is the foundation for any wood siding job. Skipping prep work creates moisture problems that show up months or years later.

Gather Your Tools

Most installations call for the same basic setup:

  • Circular saw or miter saw: Handles clean cuts on siding boards.

  • Nail gun or hammer: Speeds up fastening, though hand-nailing works for smaller jobs.

  • Level, story pole, and chalk line: A story pole helps you mark consistent reveal heights, and a chalk line snaps straight reference lines for even rows.

  • Tape measure and square: Keeps every cut accurate.

  • Flat bar: Useful for prying off existing siding and making small adjustments during install.

  • Ladder, scaffolding, or pump jacks: Required for any work above the first story board. Pump jacks make multi-story exterior wall work safer and faster.

  • Stainless steel nails, ring-shank nails, or screws: Stainless steel nails and ring-shank fasteners resist rust and hold securely in wood.

Install New Sheathing and House Wrap

If the old sheathing is damaged, replace it before moving forward. New sheathing nailed into the wall truss gives you a flat, solid nailing surface. Next, roll out house wrap across the entire wall, overlapping seams by at least six inches and taping them. House wrap blocks wind and moisture while letting water vapor escape. For added energy performance, some homeowners add foam insulation boards over the house wrap before siding goes on.

Set the Trim and Flashing

Install corner posts, J-Channel where needed, window frame trim, and flashing around every opening. At each window opening, integrate the window flange with flashing tape so water sheds outward rather than behind the wall. Flashing directs water away from the house and prevents rot behind the siding. Check the fascia board along the roofline and repair any soft spots before siding goes up.

Step-by-Step Guide to Installing Siding

Once prep is done, the actual installation follows a predictable rhythm. These steps apply to most horizontal siding, with notes for vertical siding variations.

Infographic: How to install siding in 6 steps

Step 1: Snap a Level Starter Line

Measure up from the bottom of the wall and snap chalk lines where the top of your starter strip will sit. A level starter line is the most important first step. Every row above it depends on this reference, so take your time.

Step 2: Attach the Starter Strip

Nail the starter strip along the chalk line, keeping fasteners every 8 to 12 inches. The starter strip holds the bottom edges of the first row of siding at the right angle. For wood siding, furring strips often work as a simple starter and also create a rainscreen gap that helps the wall dry out behind the boards.

Step 3: Install the First Row

Set the first piece of siding into the starter strip and nail it to the sheathing, making sure it sits flush and level. Because our siding is so dry from the natural weathering process and remains dimensionally stable, you don't need to leave expansion gaps along corner posts or trim. Fit the board cleanly against adjacent surfaces for a tight, finished look.

Step 4: Work Upward Row by Row

Install the next board over the one below, following the profile you've chosen. Shiplap and tongue and groove self-align and hide fasteners under the next row. Lap siding overlaps by about an inch, with nails driven near the top edge so the next row conceals them. Board and batten calls for consistent spacing, with battens covering the seams. Check the level every few rows to keep the wall square.

When joining lengths, align the end joints so the seam looks clean. Small errors compound over a tall wall, so verify the level often. For vertical or board and batten applications, work from one corner across, keeping each board plumb.

Step 5: Cut Around Obstacles

Mark cutouts for outlets, vents, windows, and door openings as you reach them. Seal cut ends with Centennial Cut-Seal or a comparable sealer to protect the exposed wood, especially where boards meet flashing or trim. Leave small expansion gaps here, too. Use flashing tape and caulk at every penetration to keep water out.

Step 6: Finish at the Top

The final row often needs a rip cut to fit. Install horizontal termination trim under the eaves or fascia to cap the top edge. For batten siding, finish by attaching vertical battens using screws over the seams of the wider boards.

Common Installation Challenges and Fixes

Even careful installers run into surprises. Knowing the common issues in advance makes them easier to solve on the spot.

Uneven Walls and Older Homes

Older homes rarely have perfectly square walls. Shim behind the siding or use a wedge kit to correct small gaps before nailing. Check each row with a level rather than trusting the wall itself.

Moisture Problems

When moisture builds up behind siding, rot follows. Make sure the house wrap is continuous and flashing wraps into every window opening and door. A rainscreen gap behind the boards (created with furring strips) gives water a path to drain and dry.

Wood Movement

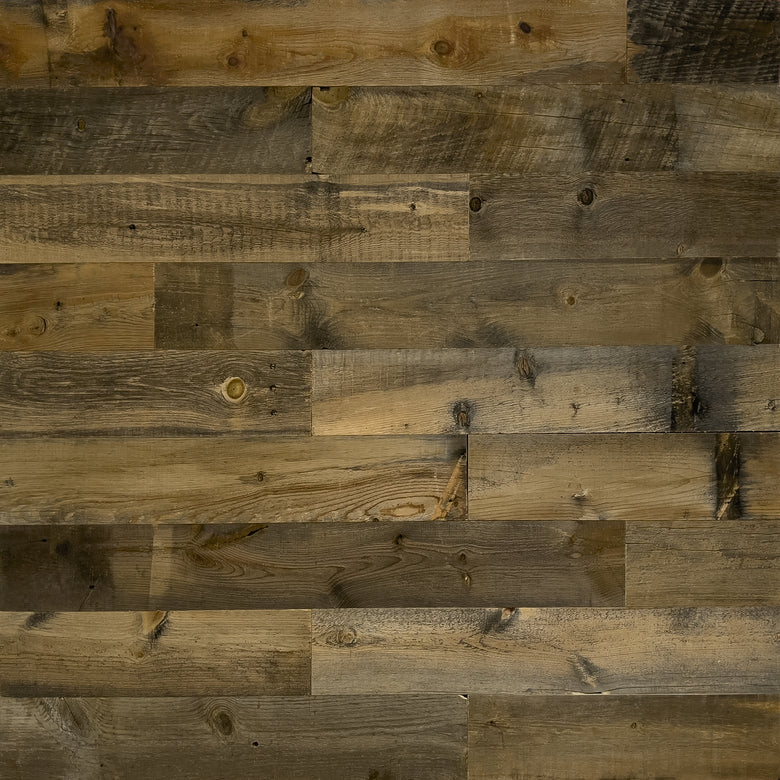
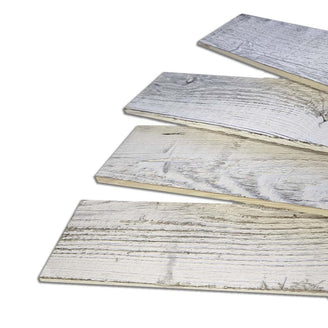
Our pre-dried reclaimed boards have a low 4 to 8 percent moisture content, making them extremely stable and showing little to no expansion or contraction once installed, especially compared to green lumber. For best results, we still recommend acclimating siding boards onsite for about 5 days before installation, keeping them uncovered but protected from rain and moisture, so they adjust to local conditions and install flatter.

Fastener Choices

Use the right nail or screw for the material. Stainless steel, ring-shank, or hot-dipped galvanized fasteners resist rust and hold well in wood. Driving a nail too tight or too loose causes boards to buckle or pull loose later.

Maintenance of Wood Siding

After installation, wood siding benefits from a protective finish every few years. Inspect boards each spring, reseal as needed, and replace any damaged pieces early. As a permanent structure on your home, exterior siding pays back the time you put into upkeep. Always follow the manufacturer's installation instructions for finish timing.

Centennial Woods: Start Your Reclaimed Wood Siding Project

wood siding on a building

For homeowners who want siding with real history, reclaimed wood is a standout choice. Centennial Woods mills its boards from Wyoming snow fencing that has weathered outdoors for 7 to 10 years, giving each piece authentic color, grain, and texture. Air-dried to 4 to 8 percent moisture content, the wood arrives stable and ready to install with less risk of cupping or warping.

Profile options include Weathered Wood Nominal 1x6, Consistent S3S, shiplap, and tongue and groove. Add a flame-retardant coating for added fire protection or Centennial Seal for UV and moisture protection. Every board meets GREENGUARD Gold standards and carries FSC® Recycled certification, supporting cleaner air and responsible sourcing. Ready to start your project? Request free samples or contact Centennial Woods today for guidance tailored to your home.